

How To 0 Gap Clippers, Zero gapping your clippers is an essential skill for barbers and hairstylists looking to achieve precision in their cuts. This technique allows for a closer cut by minimizing the gap between the blade and the cutting guard, resulting in a smoother, more seamless finish. Here’s a comprehensive guide on how to zero gap your clippers effectively and safely.
What You’ll Need
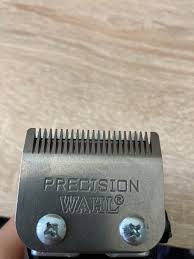
- Clippers: The clippers you want to zero gap.
- Screwdriver: Typically a Phillips-head screwdriver.
- Blade Guard: If your clippers come with a protective guard.
- Towel or Cloth: To catch any small parts and keep your workspace clean.
- Cleaning Brush: To remove hair and debris from the blades.
Step 1: Prepare Your Workspace
- Choose a Clean, Well-Lit Area: Ensure you have adequate lighting to see the small parts clearly.
- Set Up Your Tools: Lay out your tools in an organized manner. Having everything ready will make the process smoother.
Step 2: Disassemble the Clippers
- Unplug the Clippers: Safety first! Always make sure your clippers are unplugged to avoid any accidents.
- Remove the Blade: Use your screwdriver to carefully unscrew the blade from the clipper body. Keep the screws in a safe place.
- Clean the Blades: Before you proceed, use a cleaning brush to remove any hair or debris from the blades. This helps ensure a clean cut and better performance.
Step 3: Adjust the Blades
- Align the Blades: Place the blade you want to zero gap back on the clipper. Adjust it so that it sits as close as possible to the other blade without overlapping.
- Check the Gap: The ideal gap is minimal—just enough to prevent the blades from clashing when in use. You can visually inspect it or use a piece of paper to check the space between the blades. The paper should slide through with slight resistance but without getting stuck.
Step 4: Secure the Blades
- Tighten the Screws: Once you’re satisfied with the blade alignment, gently tighten the screws. Be careful not to overtighten, as this can warp the blades.
- Test the Blades: After securing the blades, manually move them to ensure they move freely without any resistance or catching.
Step 5: Test the Clippers
- Power On: Plug the clippers back in and turn them on to test their operation.
- Test on Hair: Use a small section of hair (or a hair trimmer dummy) to test the cut. Check for any pulling or snagging, which could indicate the blades are too close or misaligned.
Step 6: Make Final Adjustments
- If you notice any issues during the test, repeat the alignment and adjustment steps until you achieve the desired zero gap.
Step 7: Maintain Your Clippers
- Regular Cleaning: After each use, clean the blades with a brush and oil them regularly to ensure longevity and performance.
- Check Alignment Periodically: Over time, the blades may shift. Regularly check and adjust as needed to maintain that zero gap.
Conclusion
Zero gapping your clippers is a valuable skill that can significantly improve the quality of your haircuts. With practice and attention to detail, you’ll be able to achieve that perfect close cut, enhancing your barbering techniques. Always prioritize safety during the process, and enjoy the precision that comes with well-maintained clippers!
